
Tutorials › 9
3D finishing: waterline, steep and shallow, pencil
A 3D finishing toolpath has four strategies. Raster rows suit gentle surfaces, Waterline loops suit steep walls, Steep and shallow uses each where it's best, and Pencil cleans out the creases afterwards. This tutorial finishes the same dome four ways, then pencils the creases of a pillow panel.
Not cut on a machine yet. The waterline, steep-and-shallow, pencil and cross-hatch passes have only been checked in the simulator. Air-cut a new finish first, and try it in MDF or a soft wood before a good board.
-
The setup
The dome is 3.5 inches across and 0.7 inch tall, in a 4.5 × 4.5 × 1 inch block of hard maple. Its sides are almost vertical at the foot and nearly flat on top, so it shows where each strategy does well. To set up a job like it:
- Import the model with ⌘I (STL, OBJ, 3MF, USDZ or PLY) and set its carve depth.
- Draw a rectangle round it, the area to machine: 3.9 inches square here.
- Select both and add 3D Roughing with the ¼ inch end mill, then 3D Finishing with the ¼ inch ball nose.
- In the finish's 3D Finishing section, set Machine to Selected vectors and pick a Strategy.
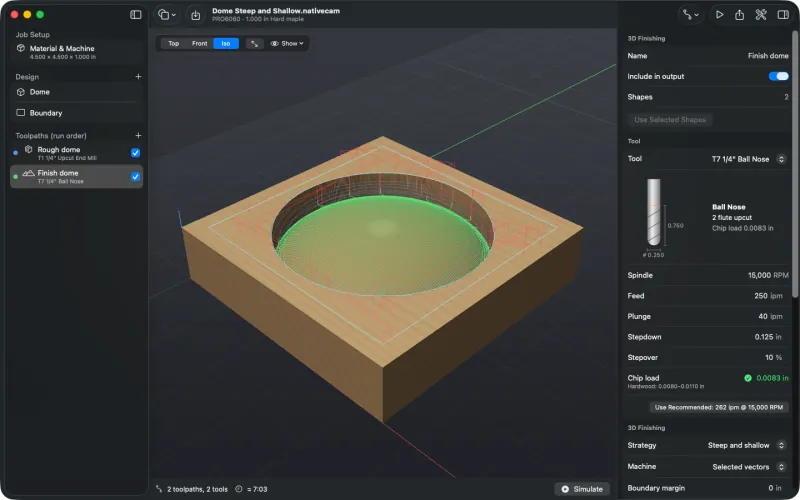
The dome with a steep-and-shallow finish selected. Every finish here runs at a 15% stepover (0.0375 inch), which leaves a 0.0014 inch scallop on flat ground.
-
Raster
Raster is the strategy older projects use. The bit runs rows along the Raster angle, following the surface up and down. It's quick and even on gentle slopes. Where a slope runs along the rows, though, the rows sit far apart on the surface. At the dome's steep foot they leave a band of ridges.
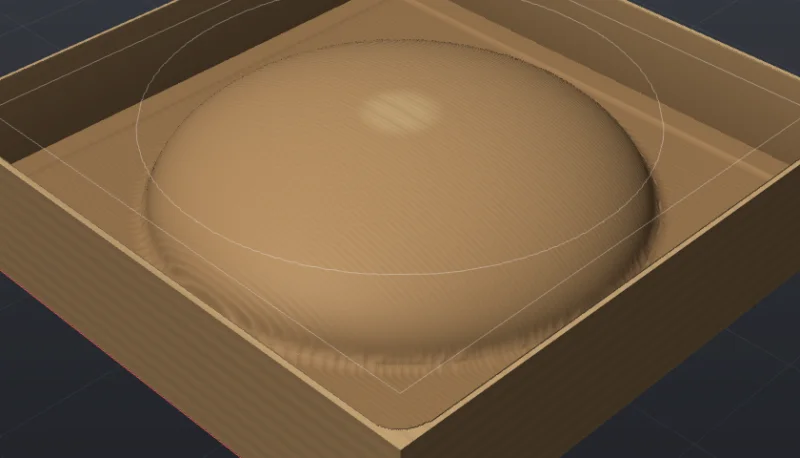
Raster: smooth on top, ridged at the steep foot. 2:28. -
Waterline
Waterline cuts flat loops round the model at one Z after another, from the top down. They're climb milled, and because each loop lies flat the post writes it as arcs. Steep walls come out smooth, since the loops are close together there.
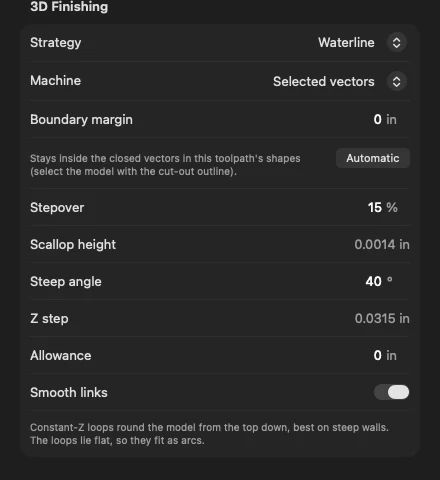
Waterline: the loops are 0.0315 inch apart in Z. The Z step is the stepover × tan(Steep angle): 0.0375 × tan 40° = 0.0315 inch. On a 40° slope the loops end up as far apart on the surface as raster rows on flat ground would. On a gentle surface they're much further apart, so the dome's flat top comes out in terraces.
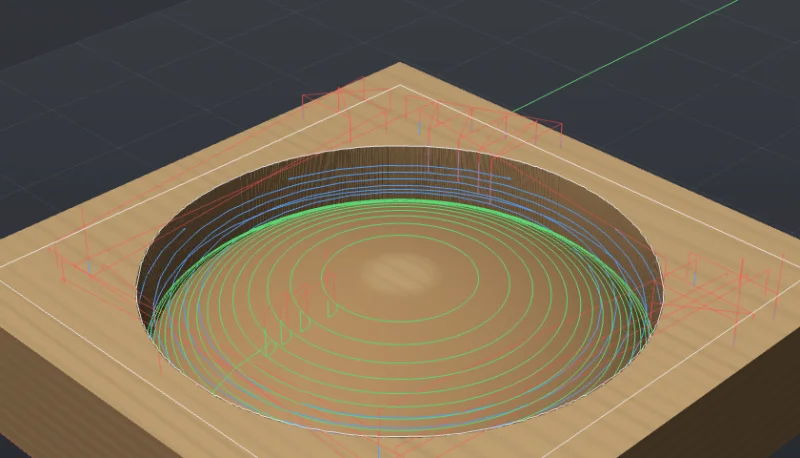
The loops crowd the foot and spread out on top. 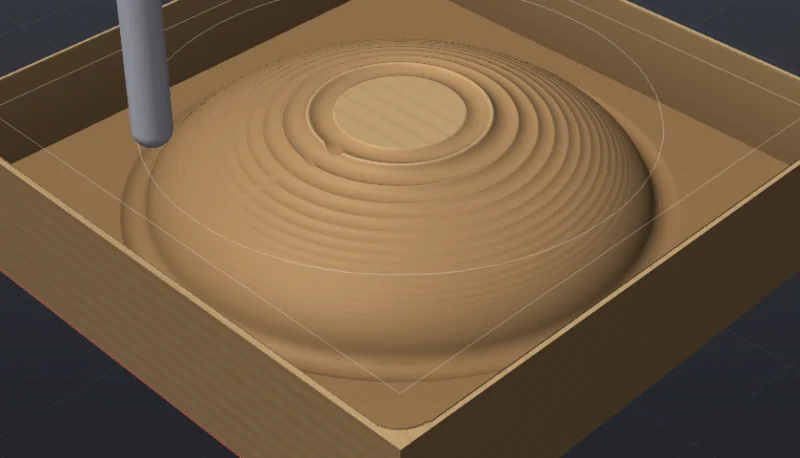
Smooth sides, terraced top. 0:54. In the posted file, each loop comes in on a short arc from its open side, then goes round in two clockwise arcs:
(Toolpath: Finish dome  Tool: T7 1/4in Ball Nose)
G00 Z0.5000
G00 X2.2587 Y1.5850
G00 Z0.1000
G01 Z-0.0315 F40.0
G03 X2.1594 Y1.7312 I-0.1228 J0.0235 F250.0
G02 X2.3313 Y2.7703 I0.0906 J0.5188
G02 X2.1813 Y1.7279 I-0.0813 J-0.5203
G01 X2.1594 Y1.7312
...
Arcs keep the file short: the waterline finish is 149 lines of G-code, against 6,903 for the raster.
-
Steep and shallow
Steep and shallow cuts waterline loops where the surface is steeper than the Steep angle, and raster rows on the rest. Each side runs an Overlap past the seam between them, so no strip is left uncut.
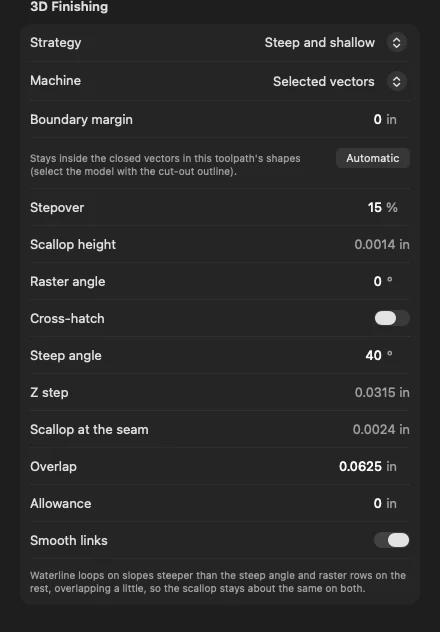
Steep angle 40°, overlap ¼ of the bit's diameter. - Steep angle (40° by default) is where waterline takes over from raster.
- Z step is worked out so the two meet evenly. At the seam, on a 40° slope, the loops and the rows are the same distance apart on the surface. So the scallop is the same either side: Scallop at the seam, 0.0024 inch here.
- Overlap is how far each side runs past the seam: ¼ of the bit's diameter by default, 0.0625 inch with the ¼ inch ball.
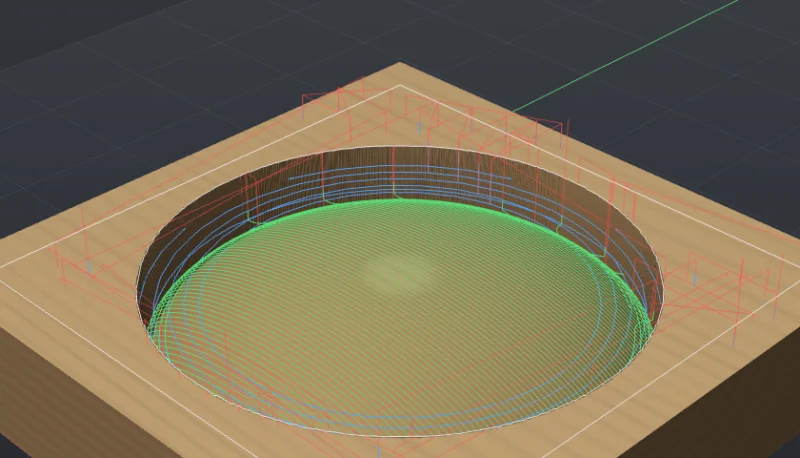
Raster rows on top, loops round the foot. 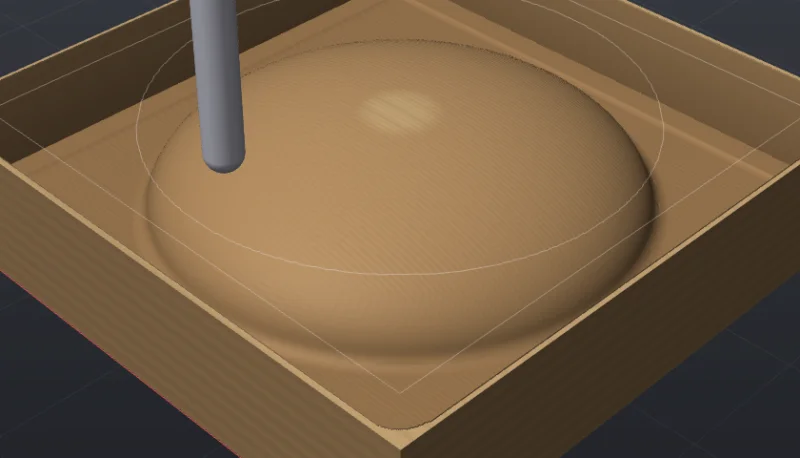
Smooth on top and round the foot. 3:22. Next to plain raster, the band of ridges round the foot is gone. Next to waterline, there are no terraces on top. It takes longer than either, 3:22 against 2:28 and 0:54, because it cuts both.
-
Cross-hatch
Turn on Cross-hatch and a raster runs twice in the same toolpath, the second time at the raster angle + 90°. Where a slope runs along the first rows, the second set climbs it, so the scallop stays small all the way round. It works on a plain raster, and on the raster part of steep and shallow. It doubles the raster's time: 4:55 against 2:28 on the dome.
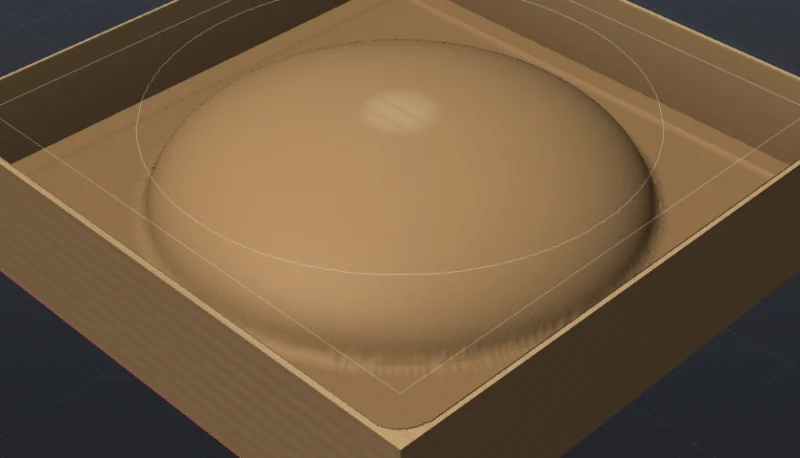
Cross-hatched raster: a fine grid all round. 4:55. On a model this steep at the foot, steep and shallow still finishes the wall better, and in less time.
-
Pencil cleanup
Where two surfaces meet in a valley, a ball nose can't reach any deeper than its own radius lets it, so the main finish leaves a rounded fillet in every crease. Pencil makes one pass along each concave crease, where the bit touches two faces at once. Run it after the main finish, with a smaller ball nose.
This panel has six overlapping pillows, each 1.24 inches across and 0.38 inch tall, in a 4.5 × 3.5 × 1 inch block of maple. They're roughed with the ¼ inch end mill and finished steep and shallow with the ¼ inch ball nose. A third toolpath, Pencil creases, uses a ⅛ inch ball nose added to the project.
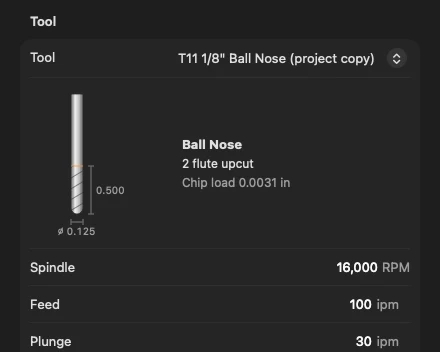
Pencil has few settings: it follows the creases it finds. 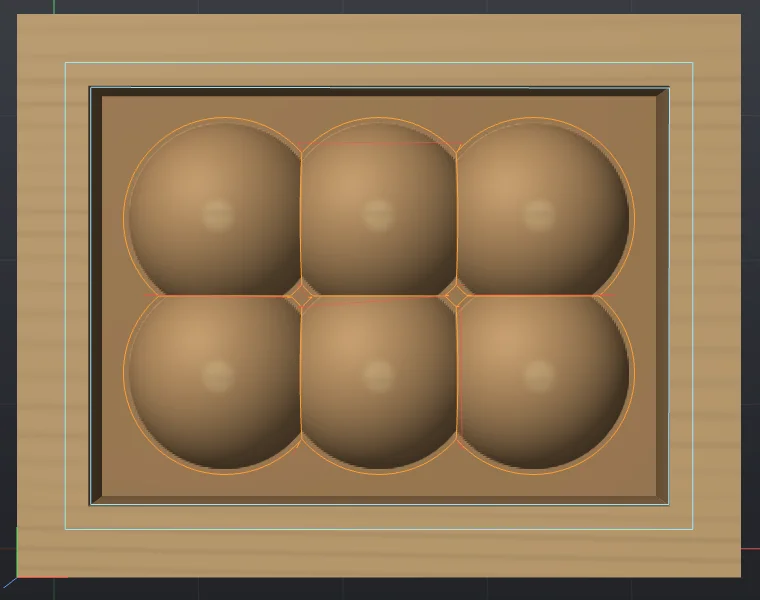
The pencil pass runs along each valley and round each pillow's foot. 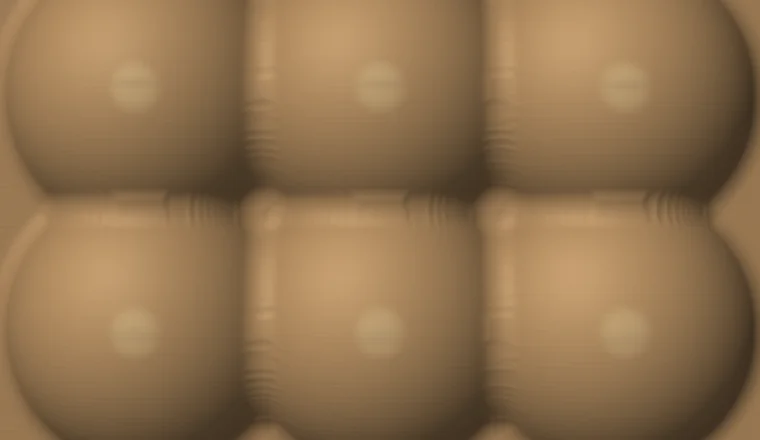
After the ¼ inch ball: soft, rippled valleys. 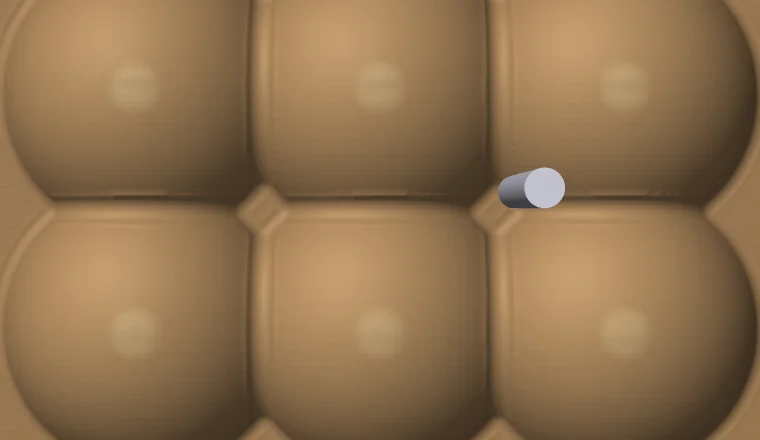
After the ⅛ inch pencil pass: crisp creases. The pencil pass takes 19 seconds of the panel's 8:23. Pencil needs a ball nose, and Checks says so if it hasn't got one: “Pencil cleanup needs a ball-nose bit; '1/4" Upcut End Mill' isn't one.”
-
Smooth links
New finishing toolpaths have Smooth links on. The raster is cut in blocks, turning between rows on an arc and ramping into rows that start on the model. Waterline loops come in from their open side. Either way the bit comes down in the air instead of onto the model, and links stay inside the boundary. Projects saved before keep their old links, so they post the same as they did.
Projects that use waterline, steep and shallow, pencil or a cross-hatched raster are saved as format 10, which older builds won't open.


Not built yet. There's no constant-scallop (3D offset), spiral or radial finishing, and no 3D rest machining: pencil makes one pass per crease and doesn't look at what an earlier, larger ball left. Waterline loops are always climb milled. The steep-and-shallow split reads the slope the bit's centre follows, which is the model's own slope for a ball nose and only close to it for other bits. See known limits.