
Tutorials › 10
Toolpath templates: save a job's toolpaths, reuse them
A template is a set of toolpaths saved with their tools and every setting, to add to the next design. It suits the signs, boxes, cutting boards and inlays you cut again and again. This tutorial saves the demo sign's toolpaths as a template, then applies it to a new sign on ½ inch plywood.
Check what a template adds. Templates are new, and nothing cut from one has been tested on a machine yet. After applying a template, look over each toolpath, its depth and its tool, and air-cut the file, as you would for any new job.
-
Put each part on a layer
A template's toolpaths find their vectors by layer, so the first step is to sort the design. A DXF, SVG or PDF drawn on layers in your CAD or drawing program brings them with it (below). For shapes drawn in NativeCAM, select them and type a name in the inspector's Layer field, or pick one of the design's layers from its menu. With several shapes selected, the field sets them all. On the demo sign (with its title changed to MAKE, as in the first tutorial):
- the sign's outline goes on
Cut Out, - the title on
V-Carve, - the plaque on
Pocket, - and the four mounting holes on
Holes.
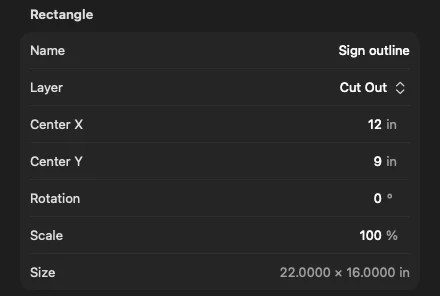
The outline on the Cut Out layer. - the sign's outline goes on
-
Say how each toolpath finds its vectors
Select a toolpath and pick from its Vectors menu:
- a layer, such as Layer “Cut Out”;
- a kind: Text, Circles, 3D models, Open vectors, Closed vectors or All vectors;
- or Chosen by hand.
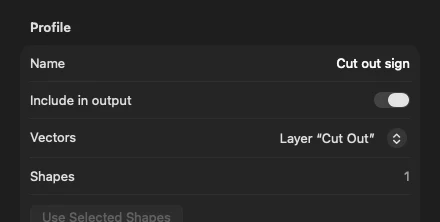
The cut-out finds its vectors on the Cut Out layer. Here each toolpath takes its own layer: the V-carve
V-Carve, the pocketPocket, the drillingHolesand the profileCut Out. A toolpath bound to a layer or kind picks up its vectors again when you change a shape's layer, import vectors or choose Toolpaths ▸ Recalculate All (⇧⌘R). Use Selected Shapes makes it chosen by hand again. For a toolpath chosen by hand, the inspector says what a template will use instead.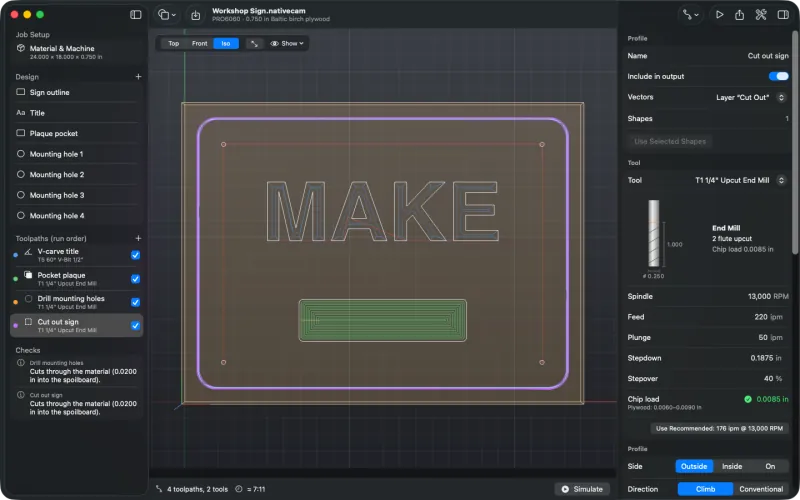
The layered sign, with the cut-out selected. -
Tie the depths to the material
A profile's or pocket's Cut depth, and a drill's hole depth, can be set three ways:
- From top: a plain depth below the top of the material.
- Through: the material's thickness plus a set amount into the spoilboard.
- Thickness −: leaves a set amount above the material's bottom.
The last two follow the thickness, both when you change it in Job Setup and in a template applied to other material. Here the pocket stays 0.25 inch From top, and the drilling and the cut-out cut Through, 0.02 inch into the spoilboard. New profiles and drills start out Through, 0.02 inch past the bottom.
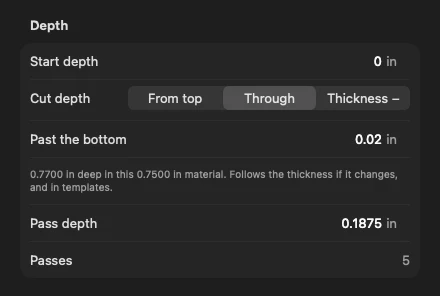
Through, 0.02 inch past the bottom: 0.77 inch in ¾ inch material. -
Save the template
Choose Toolpaths ▸ Save Toolpaths as Template…. The save panel offers the selected toolpaths or all of them, and Include the job setup: the material, its thickness, the XY and Z zero, the heights and the machine it's for. Name it
Workshop sign. It's saved, in run order, asWorkshop sign.nativecamtemplatein~/Library/Application Support/NativeCAM/Templates/.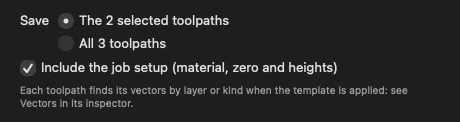
The save panel's options (shown here for a job with three toolpaths). Corner overrides set on the canvas aren't saved, because they belong to this design's shapes. A plain depth deeper than the material is saved as Through.
-
Apply it to a new sign
The new sign is 16 × 8 inches of ½ inch Baltic birch, zeroed on the spoilboard. OPEN is on
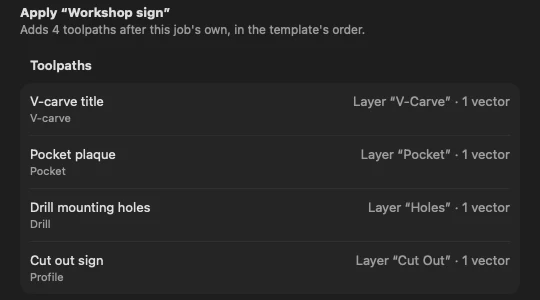
V-Carve, the outline onCut Outand two hanging holes onHoles. It has no plaque, so nothing is onPocket.Choose Toolpaths ▸ Apply Template ▸ Workshop sign. The menu lists the templates folder; Choose… opens a template from anywhere, and Show Templates Folder opens the folder in the Finder. Before anything changes, a sheet shows what each toolpath will find:
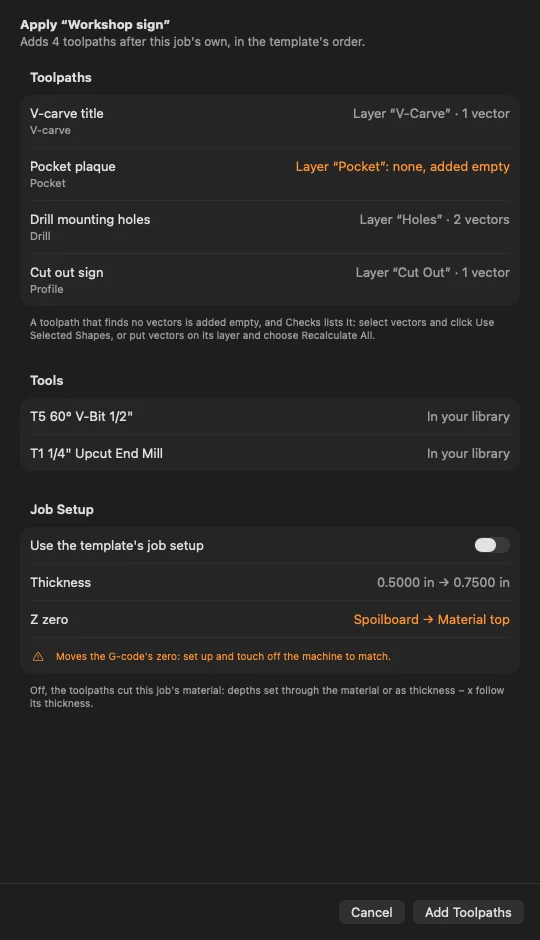
The apply sheet: what each toolpath finds, the tools, and the job setup. - Toolpaths go after the job's own, in the template's order. Pocket plaque finds nothing on
Pocket, so it's added empty, in orange. - Tools are matched to your tool library by their geometry, so a template from another library uses your bit and your tool number. A bit your library doesn't have keeps its number, unless another bit already has it, and the sheet offers to add it.
- Job Setup lists what the template's setup would change. It's used only if you turn on Use the template's job setup.
Leave the job setup off here and click Add Toolpaths. The toolpaths cut this job's material, so the two Through depths become 0.52 inch on ½ inch plywood. The pocket stays 0.25 inch, and the job stays zeroed on the spoilboard. ⌘Z takes the whole template off again.
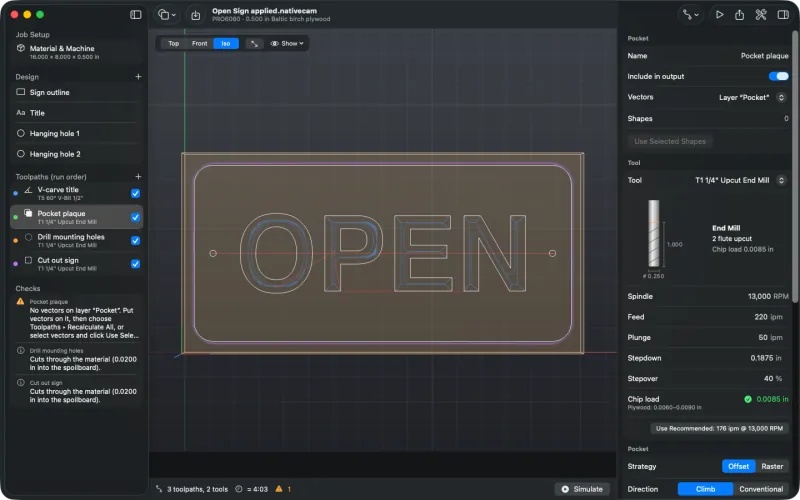
The OPEN sign with the template's toolpaths. The empty pocket is flagged in Checks. Checks flags the empty toolpath: “No vectors on layer “Pocket”. Put vectors on it, then choose Toolpaths ▸ Recalculate All, or select vectors and click Use Selected Shapes.” Here there's no plaque, so untick its Include in output or delete it.
- Toolpaths go after the job's own, in the template's order. Pocket plaque finds nothing on
-
The template's job setup
Turn on Use the template's job setup and the template's material, zero and heights replace this job's. Here that would set the thickness back to ¾ inch and move the Z zero from the spoilboard to the material top. A change to the XY or Z zero is marked in orange: if you use it, set up and touch off the machine to match.
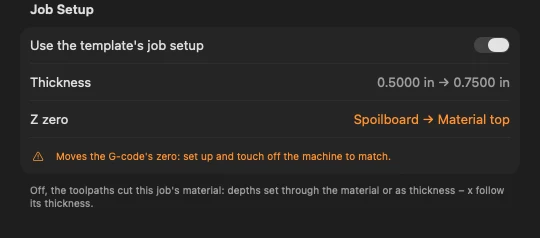
With the job setup on: the Z zero change in orange. The setup leaves out the material's width and height, and applying a template never changes the machine. The sheet says when a template was made for another one.
-
Apply it to a layered DXF
A DXF, SVG or PDF drawn on layers brings them with it, so a template finds its vectors with nothing set by hand. This sign blank is a DXF with four layers (download it):
- a 20 × 8 inch outline with rounded corners on
Cut Out, - the plaque on
Pocket, - two hanging holes on
Holes, - and a star on
V-Carve.
Start a project on 21 × 9 inch, ¾ inch Baltic birch and import the file with ⌘I.
A file with several layers comes in as one shape per layer, named file – layer and already on that layer. Pieces on different layers are never joined.
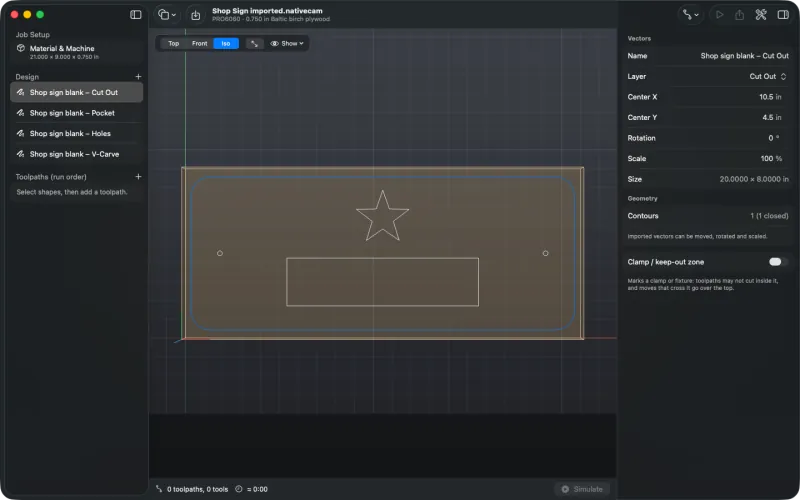
One shape per layer, each already on its layer. Now apply the Workshop sign template. Every toolpath finds its layer:
All four toolpaths find vectors on the drawing's layers. 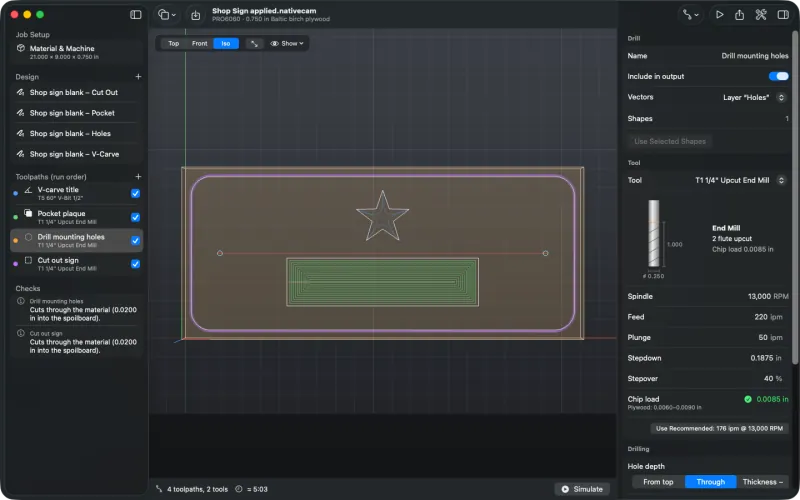
The drilling finds both holes on the Holes layer. The drilling finds both holes, since both are on the one
Holesshape, and the cut-out follows the rounded outline. The material matches the template's, so the depths are as saved, and the job is estimated at 5:03.- DXF: each entity keeps its layer. A block's entities on layer 0 take the layer of the insert that places them, as in AutoCAD, and layer 0 itself comes in as Default. A layer that's turned off or frozen in CAD is still imported, so delete what you don't want to cut.
- SVG: Inkscape layers, by name, and in files from Illustrator, Affinity and most other programs the named groups straight under the root.
- PDF and Illustrator
.ai: visible layers. Hidden ones are still left out.
A file with one layer imports as one shape, as before. Layered files saved by Illustrator, Affinity and Inkscape themselves haven't been tried yet, so check the shapes after importing one.
- a 20 × 8 inch outline with rounded corners on
-
From the command line
nativecam-cli template savesaves a project's toolpaths (add--no-setupto leave the job setup out):$ nativecam-cli template save "Workshop Sign.nativecam" -o "Workshop sign.nativecamtemplate" Saved 4 toolpaths to Workshop sign.nativecamtemplate (format 1) V-carve title: Layer “V-Carve” Pocket plaque: Layer “Pocket” Drill mounting holes: Layer “Holes” Cut out sign: Layer “Cut Out”template applyadds them to another project and prints what each one found:$ nativecam-cli template apply "Workshop sign.nativecamtemplate" "Open Sign.nativecam" V-carve title: Layer “V-Carve”: 1 vector Pocket plaque: Layer “Pocket”: 0 vectors, added empty Drill mounting holes: Layer “Holes”: 2 vectors Cut out sign: Layer “Cut Out”: 1 vector T5 60° V-Bit 1/2": in the library T1 1/4" Upcut End Mill: in the library Material 0.5000 in; 1 toolpath found no vectors Wrote Open Sign + Workshop sign.nativecamThe project itself is left alone: the result is saved beside it as
Open Sign + Workshop sign.nativecam(then… 2,… 3).-onames the file instead, and--in-placeoverwrites the project.--setupuses the template's job setup and lists the changes, hereThickness: 0.5000 in → 0.7500 inandZ zero: Spoilboard → Material top.--tools library.jsonmatches the tools against a library you exported instead of the starter one. Seetemplate.A template carries the project file format its toolpaths need, and one saved by a newer NativeCAM than yours is refused, as projects are.


Limits. Toolpaths find vectors by layer or kind, not by size: there's no filter for circles of one diameter. There's no step that creates missing layers. A DXF layer that's turned off or frozen in CAD is imported like any other, and layered SVG files from Illustrator, Affinity and Inkscape haven't been tried yet. A toolpath bound to a layer doesn't pick up a shape drawn with Add Shape until you choose Recalculate All. See known limits.