
Tutorials › 8
Chamfers, flutes and prisms
Three toolpaths follow your vectors with a shaped bit: a Chamfer bevels edges with a V-bit, Fluting cuts grooves that ramp in and out, and Prism carves a shape as a raised bevel rising to a ridge. This tutorial chamfers a bracket, flutes a panel and a column, and carves a prism star.
Not cut on a machine yet. None of the three has been cut on a real machine; they've been checked in the simulator. Good first test cuts are the ones in this tutorial: a bracket chamfered before its cut-out, flutes round a dowel, and a prism star. Air-cut each first. Flutes that turn the blank while they cut are fed in inverse time (G93), which hasn't been tested on Mach4 yet.
-
Adding them
Select the shapes, then choose Chamfer, Fluting or Prism from Add Toolpath in the sidebar, or right-click the shapes on the canvas. Their settings follow Vectric's Chamfer, Fluting and Prism Carving toolpaths, so its tutorials carry over. Projects that use any of them are saved as format 8, which older builds of NativeCAM won't open.
-
Chamfer a bracket's top edge
This L-shaped bracket, 4 × 3 inches in ¾ inch walnut with a ¾ inch hole, is cut out by a Profile with a ¼ inch end mill. To soften its top edge, select the same two shapes and add a Chamfer with the 90° V-bit.
Because a profile already cuts those shapes, the chamfer starts as Side: Inside with Vector is the: Bottom edge. The bevel rises from the outline, where the profile leaves its wall, into the part, so the part keeps the size you drew. The hole's rim is bevelled the same way, on the part's side.
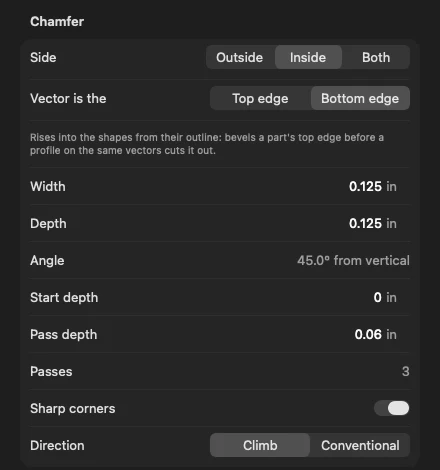
The chamfer, set up for a part's top edge. - Width and Depth are linked through the bit's angle: with a 90° bit they're the same, ⅛ inch here.
- Put the chamfer before the cut-out, while the part is still held. Optimize Run Order does, and Checks warns if it comes after.
- Checks also warns when the profile would cut the bevel away, or leave a sharp lip along the wall, and says what to set instead.
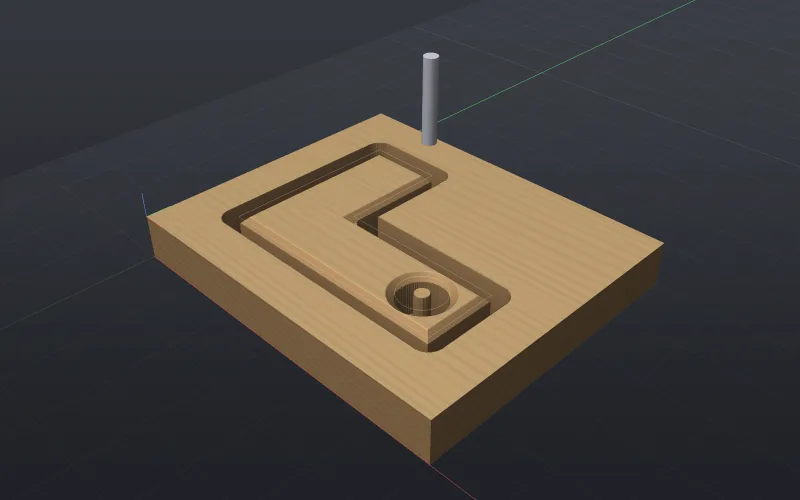
Chamfered, then cut out. The disc in the hole is waste. Side and Vector is the together give the four kinds of chamfer Vectric offers, plus Both:
- Top edge, outside: a raised part's top outline, the bevel sloping down outside it. Cut the part out at least the bevel's width further out.
- Top edge, inside: a countersink round the top of a hole.
- Bottom edge, outside: the rim of a hole or pocket cut on the vector.
- Bottom edge, inside: a part's top edge, as here.
- Both: bevels either side of the vector, a V-groove along a bottom edge or a sharp ridge along a top edge.
The inspector says in a line what each choice does.
-
Sharp corners
Sharp corners, on by default, keeps the bevel's corners crisp: the bit runs out to a mitre round the outside of a corner, and rises along the bisector into a valley, as a V-carve does. Turned off, the bit stays at depth all the way round, and corners come out rounded, as a bearing-guided chamfer bit leaves them. Here's the inside corner of a smaller L with a 0.2 inch bevel:
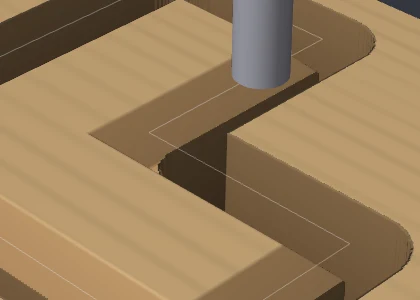
Sharp corners on: a crisp valley. 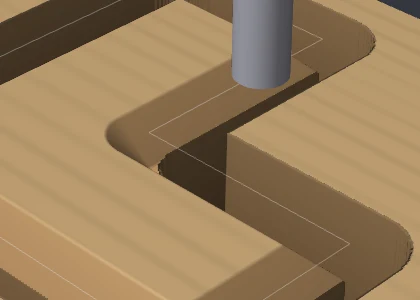
Off: the bevel rounds the corner. -
Flutes on a panel
Draw lines (or closed shapes) where the flutes go. Here five 3 inch lines, ¾ inch apart, sit on a walnut panel. Select them and add Fluting with the ¼ inch ball nose. A core box bit, entered in the tool library as a ball nose, or a V-bit also works.
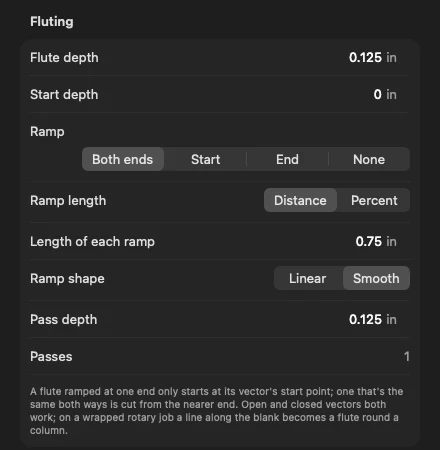
Ramped at both ends, ¾ inch each, smooth. - Ramp: both ends, start, end or none. A flute ramped at one end starts at its vector's start point; one that's the same both ways is cut from whichever end is nearer.
- Ramp length: a Distance, or a Percent of the longest it can be (100% ramps the whole flute with one ramp, or to its middle with two).
- Ramp shape: Linear, or Smooth, easing into full depth.
- Deeper flutes are cut in passes. Each pass follows the whole flute with its ramps scaled to its depth, so the last pass runs the full length.
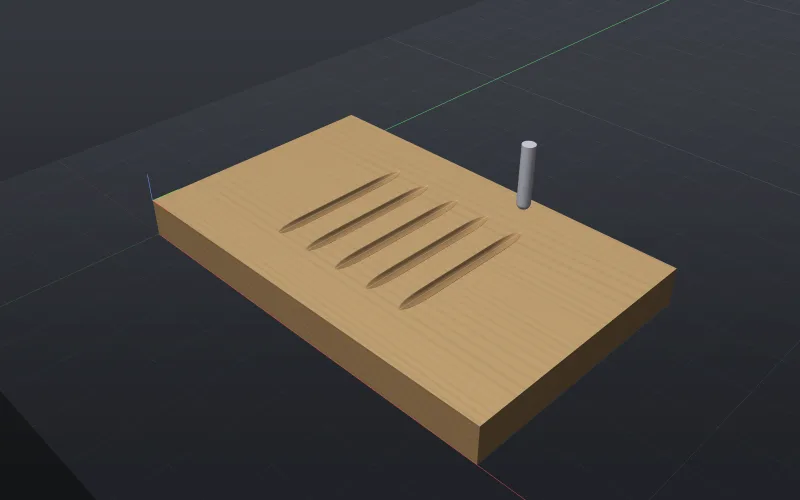
Five flutes, tapering in and out. -
Flutes round a column
On a wrapped rotary job, lines drawn along X on the sheet become flutes along a column. This 2 inch poplar dowel, 12 inches long, is set up as in the wrapped tutorial, with eight 8 inch lines spread round the sheet, cut 0.08 inch deep with the ball nose and 1 inch smooth ramps.
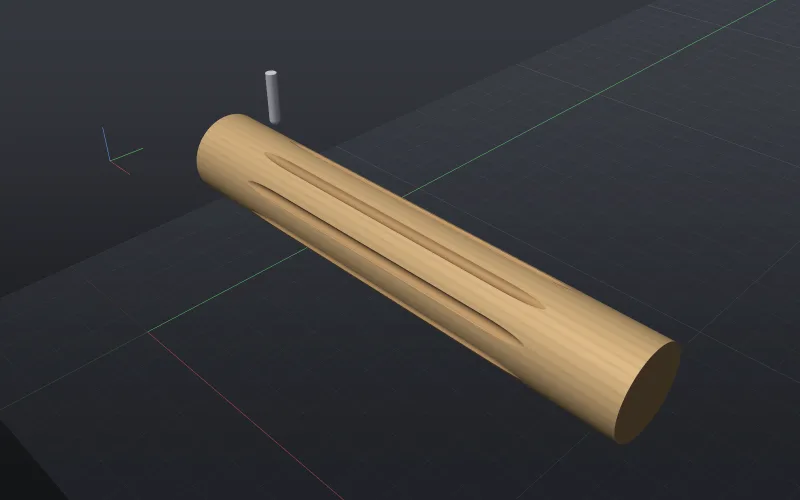
Eight flutes round a 2 inch dowel. - Each straight flute is cut at one angle, and the blank turns to the next with the tool at safe Z. A flute drawn at an angle on the sheet turns the blank as it cuts, and those moves are fed in inverse time (
G93) for Avid Mach4, LinuxCNC and grblHAL. Run the G93 test first. - Keep wrapped flutes shallow. At 0.15 inch deep, Checks warns that a cut that deep into a 1 inch radius comes out 15% narrower around the blank at its bottom.
- Before the first wrapped cut, check which way your rotary turns, as Checks reminds you.
- Each straight flute is cut at one angle, and the blank turns to the next with the tool at safe Z. A flute drawn at an angle on the sheet turns the blank as it cuts, and those moves are fed in inverse time (
-
Carve a prism star
Select closed shapes, lettering, a star or a diamond, and add Prism with a V-bit. The bit's tip runs round the outline, and the shape rises to a ridge along its middle. With Full prism on, the depth is just enough for the slopes to meet in a ridge at the widest part: 0.416 inch for this 1.2 inch star with the 60° bit, shown as Full prism depth. Turn it off and set a shallower depth, and the star keeps a flat top.
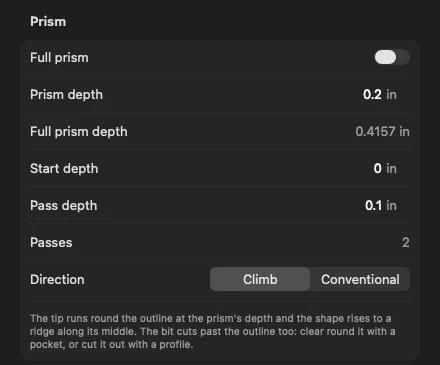
A shallower prism: 0.2 inch against the full 0.416. The far side of the V-bit cuts past the outline too, so clear round the prism yourself, as you would in Vectric. Here a Pocket with the ¼ inch end mill clears a 2.3 inch round recess to the prism's depth, with the star as an island, before the prism is cut.

Full prism: ridges meet at the top. 
0.2 inch deep: a flat top. A prism deeper than the bit's V can't be cut as drawn, and Checks says so. Scaled up to 2 inches, the same star would need 0.693 inch with the 60° bit:
The prism is 0.6928 in deep, but '60° V-Bit 1/2"' only cuts 0.4330 in down its V, so its slopes stop at a step. Use a larger V-bit, a smaller prism depth or smaller shapes.
-
The setup sheet
The setup sheet's Chamfers, flutes and prisms section lists each one, for example “a bevel 0.125 in wide and 0.125 in deep inside the shapes, its bottom edge on the vector, with the 90° T6; sharp corners.”


Not built yet. There's no Overcut (Vectric's offset that keeps a V-bit's tip off the bevel), no angled chamfer with a round-nose bit, and flutes aren't projected onto 3D models. A top-edge chamfer leaves the bevel uncut where shapes are closer together, or narrower, than twice its width. See known limits.