
Tutorials › 12
Jobs bigger than the bed: tiling
When the material is longer than the machine reaches, NativeCAM cuts it in tiles: one file per tile, run one after another as the board moves. This tutorial cuts a 96 inch sign on a machine with about 61 inches of travel, fed through in two tiles, with dowel holes so the second tile lines up exactly.
Not cut on a machine yet. Tiling hasn't been tried on a real machine. Before a real job, air-cut both tiles of a two-tile job with registration holes turned on, then cut one in scrap MDF to check that the dowels line the board up and that the seam between tiles doesn't show.
-
The job
The sign is a 12 × 96 inch board of ¾ inch Baltic birch. WELCOME is V-carved along it in 6 inch letters with the 60° V-bit, there's a hanging hole near each end, and a ¼ inch end mill cuts it out with tabs. The PRO6060 reaches about 61 inches in Y, so the board can't be cut in one go. The settings follow Vectric's Toolpath Tiling Manager, so its tutorials carry over.
-
Turn on tiling
Select Material & Machine under Job Setup and scroll to Tiling. Turn on Cut in tiles and choose how the board moves:
- Feed-through in Y (or in X), for a machine open at the front and back (or the sides): the board slides through one tile length at a time. Each tile is the board's full width, which has to fit the other axis's travel; 12 inches is fine here.
- Individual tiles: tiles across and up, for separate boards, or a board moved both ways.
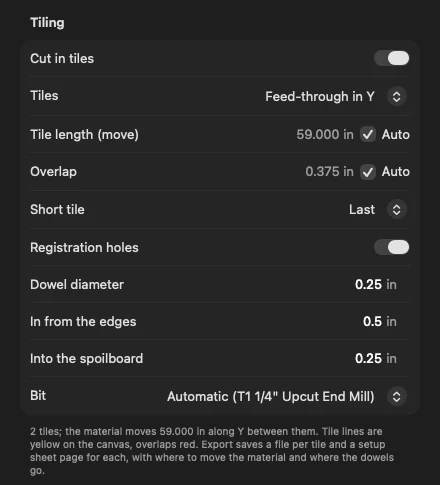
Feed-through in Y: two tiles, a 59 inch move between them. - Tile length is how far the board moves between tiles. Automatic is the travel less the overlap, the largest bit and a 1 inch margin, rounded down to a whole inch: 59 inches here.
- Overlap is how far each tile reaches past its tile lines. Automatic is the largest bit's radius plus ⅛ inch: 0.375 inch with the ½ inch V-bit.
- Short tile puts the shorter remainder tile last (here, 37 inches) or first.
-
Check the tiles
On the canvas, tile lines are drawn in yellow with the overlap either side hatched in red, and the registration holes are circled. Checks says what the export will make: “Cut in 2 tiles, moving the material 59.000 in along Y between them. Export saves 2 files and a setup sheet with a page for each tile.” It flags a tile that reaches past the machine's travel, or a board too wide to feed through.
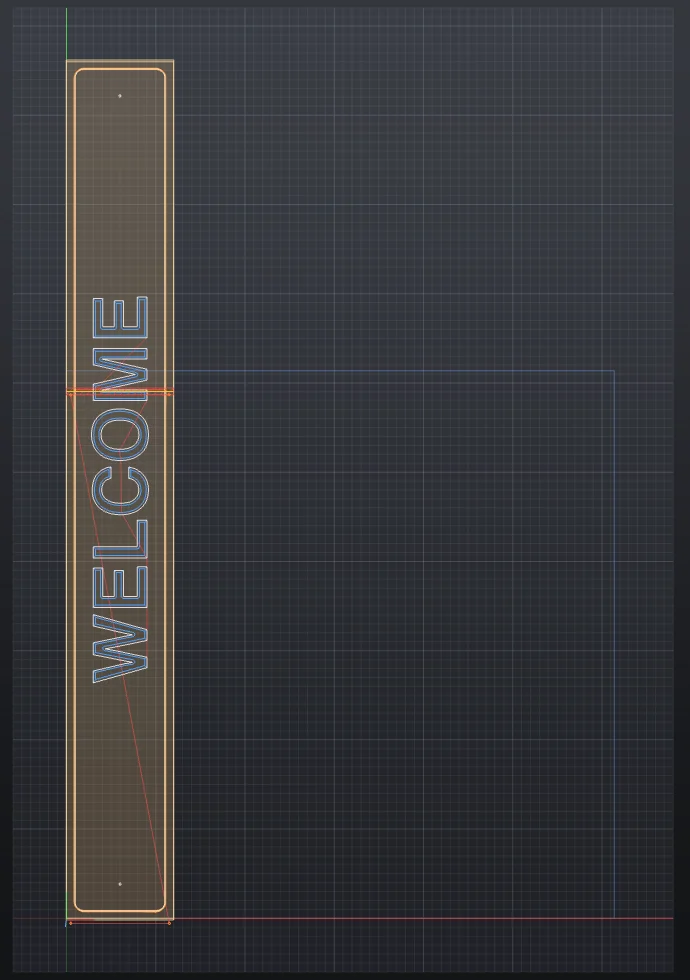
The tile line crosses the lettering; the blue outline is the machine's travel. -
Registration holes
With Registration holes on (feed-through only), NativeCAM drills holes for dowels, so the board lands exactly one tile length on after each move. Tile 1 drills two holes into the spoilboard just in front of the board, and two through the board one tile length further on. After the move, those two sit over the spoilboard holes, and a dowel through each lines the board up. Every tile but the last drills the pair for the next.
- Dowel diameter is the hole size, In from the edges how far each hole is in from the side of the board, and Into the spoilboard how deep the holes go below it.
- Bit: automatic picks the job's largest straight bit that fits the hole, so there's usually no extra tool change. Here the ¼ inch end mill drills the ¼ inch holes in pecks; a smaller bit bores the hole in rings. The holes are drilled first in each tile.
The holes have to be in waste. With them 1 inch in from the edges, they landed on the sign's cut-out, and Checks gave six errors, for example:
The registration hole tile 1 drills at X 1.0000, Y 58.6250 is where “Cut out sign” cuts, and a dowel stands in it while tile 2 cuts. Change the edge offset or the tile size so the holes land in waste.
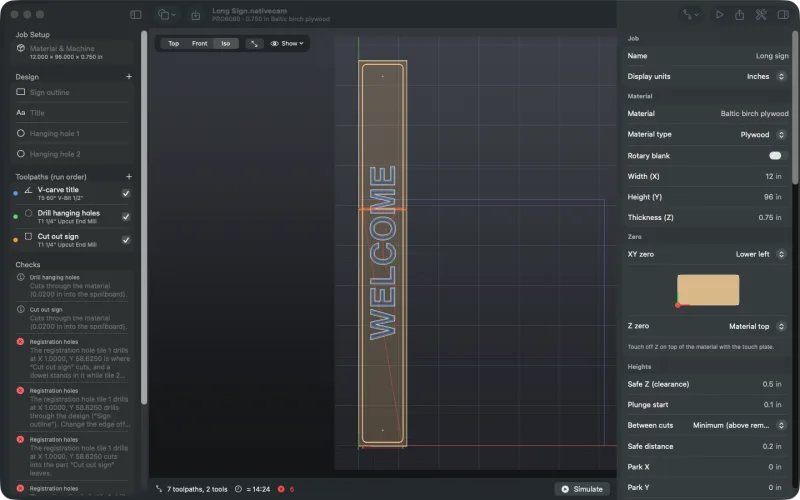
Holes on the cut-out: errors in Checks, and the command line won't write the files. Moving them to 0.5 inch in from the edges puts them in the waste between the board's edge and the cut-out, and the errors go.
-
Export one file per tile
Press ⌘E. NativeCAM saves a file per tile,
Long Sign - tile 1 of 2.tapandLong Sign - tile 2 of 2.tap, with the setup sheet beside them. A controller that can't stop for a tool change gets a file per tool within each tile too. Every file uses the same XY zero, the board's lower-left corner, as it is when tile 1 runs.The setup sheet has a page for each tile (the sign's): the file to run, how far to move the board and which way, where the dowels go, what the tile drills, its share of the board and a picture of it. For tile 2 it says:
Move the material 59.000 in toward Y−; keep the XY zero. … Line the holes tile 1 drilled up over the spoilboard holes and drop a 0.250 in dowel through each, at X 0.500 in, Y -0.375 in and X 11.500 in, Y -0.375 in. Clamp the material, then tap the dowels flush or pull them out before starting.
-
Simulate the tiles
Press ⌘R. The tiles are simulated one after another with the board in place, so the finished part is the whole job. Tiles in the simulation bar jumps to the start of any tile.
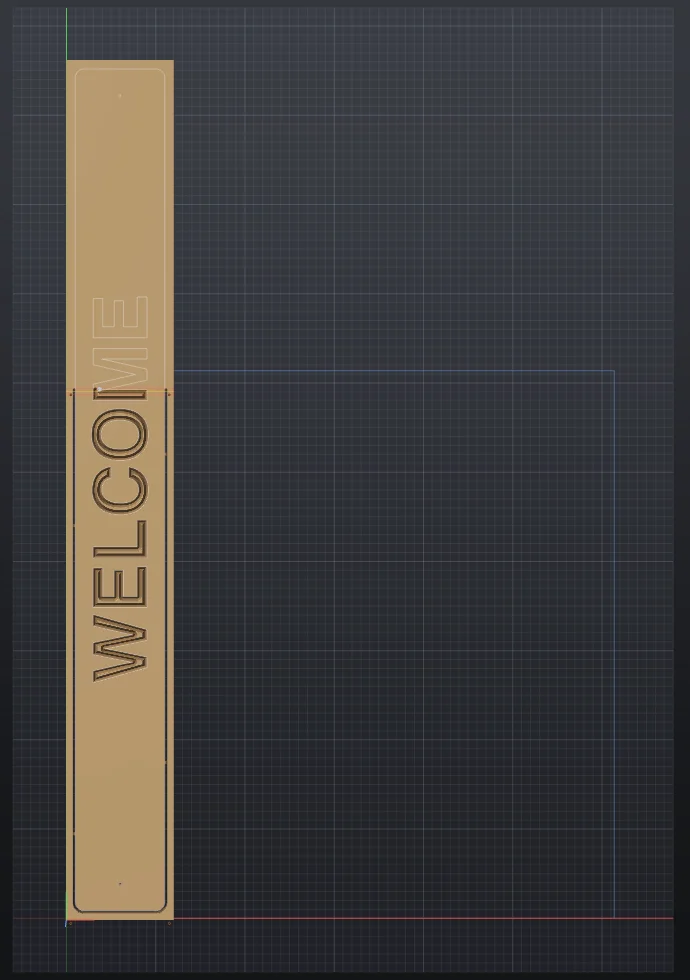
The start of tile 2: tile 1's share is cut. 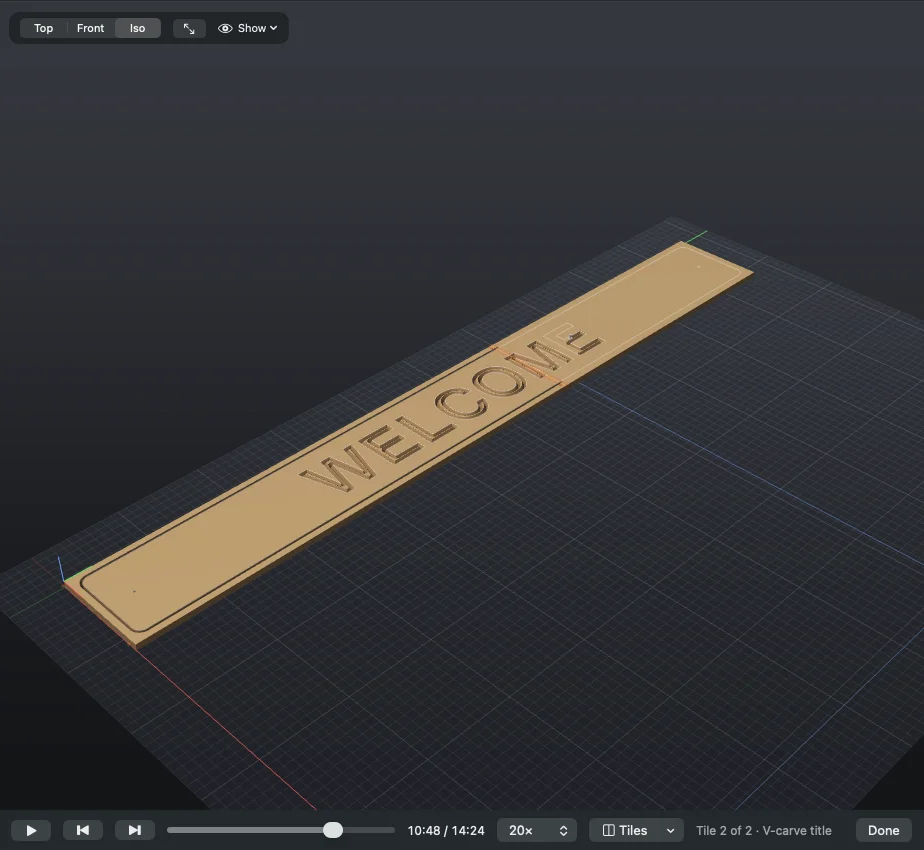
Part way through tile 2, with the Tiles menu. How cuts are split. Each cut belongs to the tile whose share of the board it's in. A cut that crosses a tile line, like the letters here, runs on into the overlap before it breaks, so it never breaks on the seam itself. Where it breaks, the tool lifts, and the next tile comes back down onto the same point, straight down or ramping along the cut. Toolpaths that rely on an earlier one (a rest-machined pocket's larger bit, a V-carve's flat clearing, a 3D rough before its finish) stay in order across the tiles.
-
Run it
- Set the XY zero at the board's lower-left corner, as the setup sheet says, and keep it for every tile.
- Run tile 1. It drills the two spoilboard holes in front of the board and the two through it at 58⅝ inches, then cuts its share.
- Unclamp and slide the board 59 inches toward Y− until the holes tile 1 drilled are over the spoilboard holes. Drop a ¼ inch dowel through each, clamp, then tap the dowels flush or pull them.
- Run tile 2 without changing the XY zero. Re-zero Z only if the board isn't flat.
The job is estimated at 14:24: 6:41 for tile 1 and 3:21 for tile 2, plus the tool changes. The simulation's clock runs to the same time. Neither counts the time to move the board.
Tiled jobs are saved as format 9, which older builds won't open. Rotary jobs can't be tiled.

Limits. Registration holes are drilled for feed-through tiling only, two at a time. Where a profile breaks at a tile line, the bit comes back onto the wall with a plunge or a ramp rather than a lead. Clamps are checked where they're drawn on the design, which moves with the board. See known limits.