
Tutorials › 6
A V-carve inlay: pocket and plug
A V-carve inlay is a plug of contrasting wood glued into a V-carved pocket, then planed flush. Both sides come from one design and one V-bit. This tutorial inlays the word JOY in maple into a walnut board, then carves a star inside an existing pocket with a start depth.
Not cut on a machine yet. No inlay pair has been cut on a real machine. The fit has only been checked in the simulator, by nesting a simulated plug in its simulated pocket. Air-cut each side, cut a small test pair in scrap, and check that the plug seats before you glue up a real piece.
-
How it fits
The pocket (female) is an ordinary V-carve into the main board, with a flat floor where the design is wide. The plug (male) carves away the wood around the mirrored design on a second board, so the design stands proud. Turned over and pressed in, the plug's sloped walls meet the pocket's all the way round before its face reaches the pocket's floor, which leaves a small gap for glue. The settings follow Vectric's VCarve Inlay toolpath, so recipes written for it carry over.
-
Draw or import the design
Choose Add Shape ▸ Text and type JOY, or import artwork with ⌘I. Bold shapes inlay best: thin strokes come out as narrow V grooves with no floor, and the plug's matching parts are fragile. Here the text is Helvetica Bold with a 2 inch cap height, centred on a 7 × 4½ inch walnut board. Draw the design the right way round: the plug is mirrored for you.
-
Carve the pocket
Select the design, choose Add Toolpath ▸ V-carve with a 60° V-bit, and set Inlay to Pocket. It gets a Flat depth of 0.2 inch, the pocket depth (P). Under Clear flat area with, choose a ⅛ inch end mill.
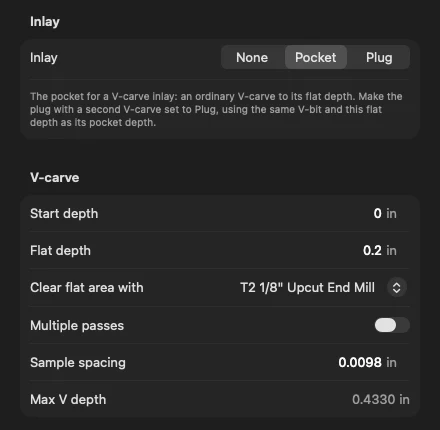
The pocket: an ordinary V-carve to a 0.2 inch flat depth. Narrow parts are carved as a plain V. Wider parts get a flat floor at P, cleared by the end mill first; then the V-bit carves the walls and cleans up the corners and narrow places the end mill can't reach, so nothing stands proud of the floor.
Without a clearance tool, the V-bit clears the flat floor itself, in rings close enough that the ridges between them stay well under the glue gap. It's slower, so use an end mill for large areas.
-
Add the plug
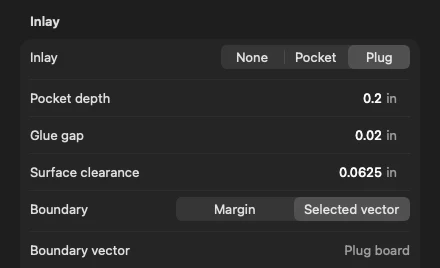
Select the same design, add a second V-carve and set Inlay to Plug. Picking Plug copies the pocket's flat depth, V-bit and clearance tool, so the defaults already fit:
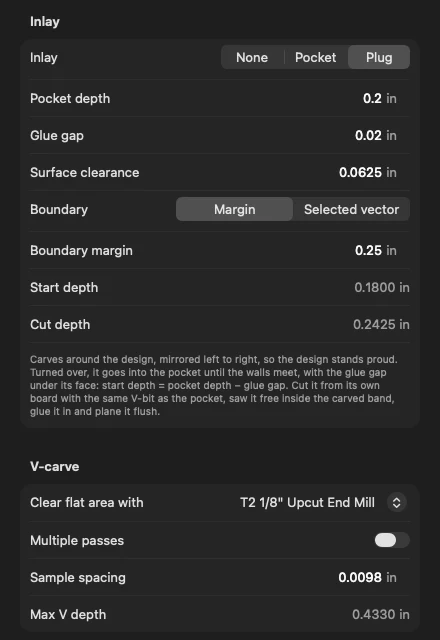
The plug with the default pocket depth, glue gap and surface clearance. - Pocket depth (P, 0.2 inch): the pocket's flat depth.
- Glue gap (G, 0.02 inch or 0.5 mm): the gap left between the plug's face and the pocket's floor.
- Surface clearance (C, 1⁄16 inch): how far the plug board's carved floor stays above the pocket board's surface when the walls meet. It leaves room to clamp the plug in, and it's the waste you saw or plane off afterwards.
- Boundary: where the carving round the design stops. Margin carves the Boundary margin (¼ inch) past the design's outline. Selected vector is below.
The plug is carved from its start depth, S = P − G = 0.18 inch, down to S + C = 0.2425 inch, both shown in the inspector. At depth S its walls lie exactly on the mirrored outline, and above that they lean in at the bit's angle, as the pocket's do. Flipped into the pocket, the walls meet when the plug's face is S deep, which leaves P − S = G under it.
The plug is mirrored left to right inside the toolpath, about the centre of the design. Leave the design as drawn: the shapes on the canvas don't change.
-
Read the fit check
With both toolpaths included, Checks shows a warning on the plug, because the two would be cut on top of each other in one file:
Overlaps its pocket “Inlay pocket”, and both are included in the output. Cut the plug from a separate board: turn off Include in output for one side before exporting the other.
That one is expected; you'll export the sides one at a time. The other inlay checks compare the plug with its pocket (the inlay pocket on the same design), even when one side is turned off. If you deepen the pocket later, to 0.25 inch say, the plug's inspector shows the difference with a Match button:
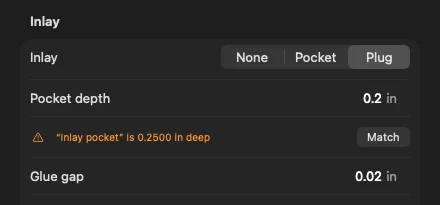
Match sets the plug's pocket depth to the pocket's flat depth. and Checks says what the plug would really do:
Pocket depth is 0.2000 in, but “Inlay pocket” is 0.2500 in deep (its flat depth), so the plug would sit 0.0700 in off the pocket's floor instead of the 0.0200 in glue gap. Set Pocket depth to 0.2500 in.
Checks also warns when the plug won't seat for other reasons:
- a V-bit with a different angle or tip from the pocket's
- a pocket depth deeper than the pocket, so the plug bottoms out before its walls meet
- no glue gap, or one too small for the ridges a V-bit leaves where it clears a floor
- no surface clearance
- a plug cut deeper than the bit's V is tall
- a V-bit with a flat tip, which leaves narrow parts of the plug taller than the pocket's grooves
-
Simulate each side
Turn off Include in output on the plug and press ⌘R to simulate the pocket. Then turn it back on, turn off the pocket, and simulate the plug.
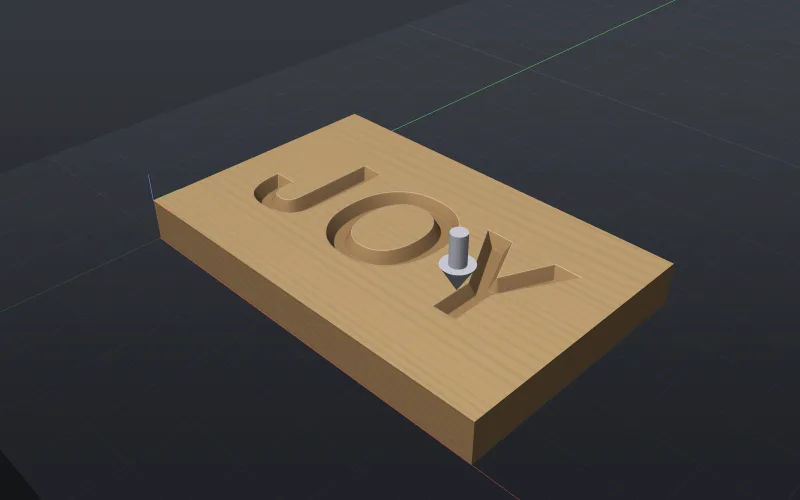
The pocket: JOY carved 0.2 inch deep. 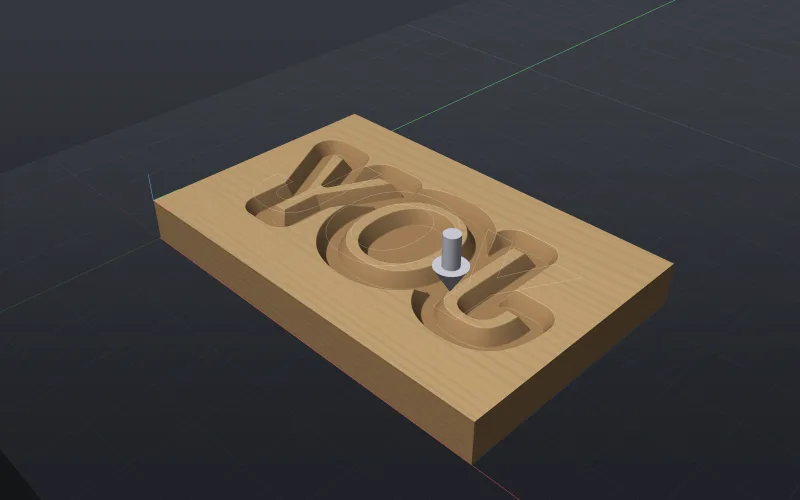
The plug: mirrored, standing proud. The thin lines are the design as drawn. The middle of the O is carved on the plug too, so the O's centre stays walnut. Here the pocket takes about 3½ minutes and the plug about 5, most of it the end mill clearing the band round the plug.
-
Carve the whole plug board (optional)
With Margin, only a band round the design is carved, and you saw the plug free inside it. To carve the whole top of the plug board down instead, draw a rectangle the size of the board round the design. Select the design and the rectangle, click Use Selected Shapes in the plug's inspector, and set Boundary to Selected vector. The inspector names the vector it uses: the closed one that goes round all the others.
A selected vector as the plug's boundary. 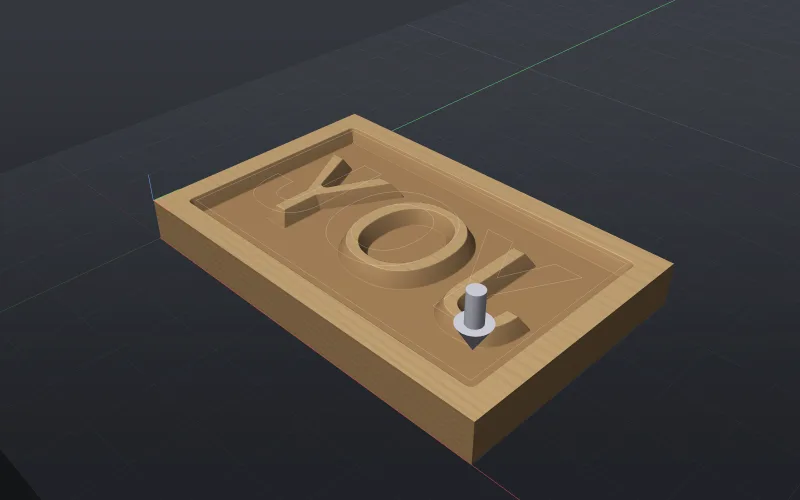
Everything inside the Plug board rectangle is carved down to the plug's cut depth. It's a choice rather than a guess because a design can have a shape round the rest of it too, like a frame. Leave the rectangle out of the pocket's toolpath.
-
Export and cut the two sides
With the plug turned off, press ⌘E to check and export the pocket. Then turn the pocket off and the plug on, and export again under another name. Each side cuts with the end mill first, then the V-bit, with a tool change between. Save a setup sheet for each with File ▸ Export Setup Sheet…: its Inlay section lists the toolpath's side and depths (example for the plug).
- The project's material is the pocket board. Zero X, Y and Z on each board's own top, so the plug board only has to be larger than the carved area. If it's a different wood, change Material before you export the plug, so the chip-load checks and the setup sheet match.
- Use the same V-bit for both sides, and touch off Z carefully after each tool change: the fit depends on both sides being cut to their depths.
- Air-cut each file first, as with any new program.
Posted a deep plug with an earlier build? Post it again. Before a fix, a plug with a pocket depth of about 0.22 inch or more could rapid sideways below the top of the board between cuts, and Checks flagged it as an error. Links now go over at the safe distance above the top. The tutorial's 0.2 inch plug wasn't affected, but re-post any deeper plug before you cut it.
-
Glue up and plane flush
- Saw the plug free inside the carved band (with Margin), or leave the board whole.
- Dry-fit it first: turned face down, the plug should go in until its walls meet the pocket's, with the plug board's carved floor about 1⁄16 inch above the pocket board.
- Spread glue on the walls, press the plug in face down and clamp it.
- Once the glue has cured, saw off most of the plug board above the joint, then plane or sand the rest flush with the pocket board's surface.
-
Carve inside an existing pocket: start depth
Every V-carve has a Start depth: the carve is worked out as if the material top were that much lower. On a plug it's set by the pocket depth and glue gap. Elsewhere, use it to carve inside an existing pocket.
This 5 inch maple coaster has a 3½ inch round recess, pocketed ⅛ inch deep with a ¼ inch end mill, and a star V-carved on the recess floor. The star's V-carve has Start depth 0.125 inch, the recess depth, and a 0.1 inch Flat depth. As in Vectric VCarve, the flat depth is measured down from the start depth, so the deepest cut is 0.225 inch, shown as Deepest cut.
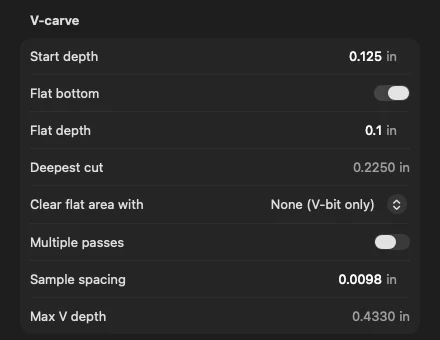
Flat depth counts from the start depth. 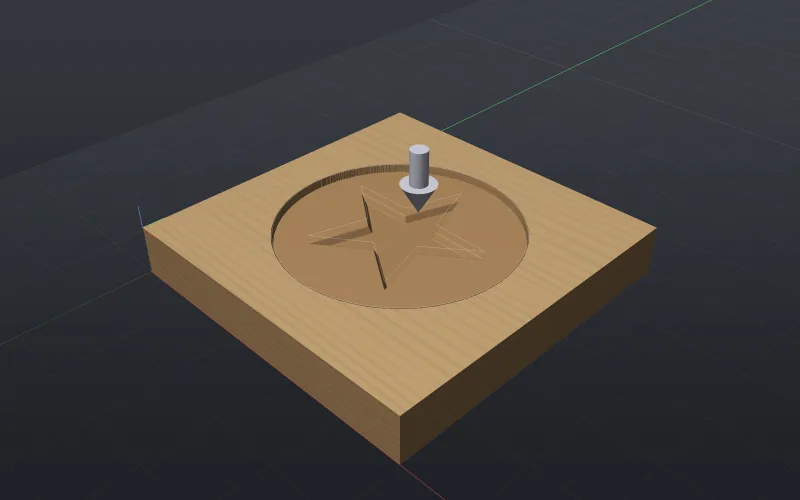
The star is carved from the recess floor, not the board's top. With no clearance tool, the V-bit clears the star's flat middle itself, and the star takes about 5 of the job's 6½ minutes. A clearance end mill is quicker over large flat areas, and it skips the depths the recess pocket already cleared.
Projects that use a start depth or an inlay plug are saved as format 6. Older builds of NativeCAM won't open them rather than carve them from the surface. An inlay pocket on its own doesn't change the format.
Changed for existing projects: a flat-bottomed V-carve with no clearance tool now has its flat cleared by the V-bit, as Vectric VCarve does. Before, the middle of the flat was left standing. Older projects like that re-export with different G-code, so simulate them again before you cut.


The repository's documentation has the full inlay reference.